
드디어 모바일 과목이 종강했다!
앞으로 안드로이드 스튜디오를 다시 켤 일이 없을 것 같긴 한데 (아니 삭제하기 전에)
마지막으로 프로젝트하면서 한글로 된 정보가 많이 없었던 Firebase fcm 서비스에 관련해 포스팅을 하고 마치도록 하겠다!
[시작 전 알고 있어야 할 내용들]
- Firebase와 프로젝트 연결 방법
- 기본적인 textview, button 넣는 방법 (xml 파일)
- Firebase database 사용 방법 (push, set, addValueEventListener, datachange snapshot,...)
뭐 많이 요구하는 것 같으나 fcm까지 왔으면 위 내용을 모를 수가 없다고 생각한다.
시작 전에, 이 포스팅 내용에 대해 영상을 보면서 따라 하고자 하면 아래 링크를 참고하면 좋을 것 같다.
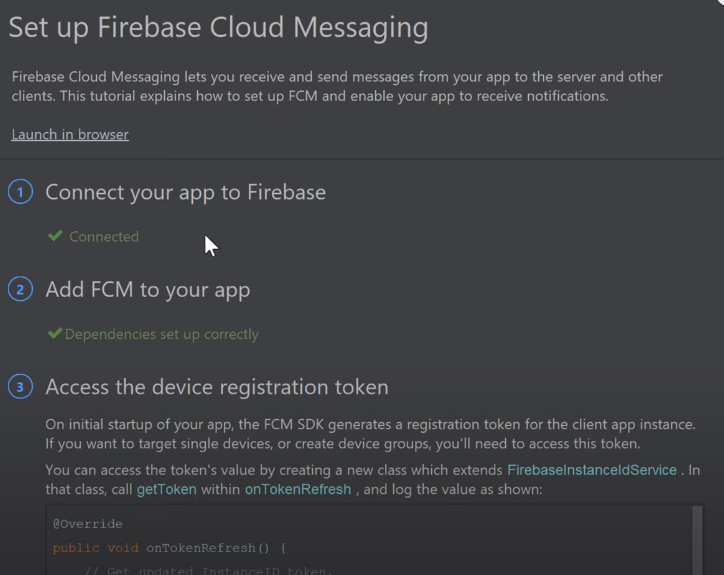
1. fcm set up
[Tools] - [Firebase] 클릭 후 "Cloud Messaging"을 눌러 프로젝트에 fcm 기본 설정을 추가해준다.
2. Gradle : 모듈 파일에 fcm, coroutines, retrofit implement 후 sync 해주기!
    //fcm
    implementation 'com.google.firebase:firebase-messaging:20.0.0'

    //Coroutines
    implementation 'org.jetbrains.kotlinx:kotlinx-coroutines-core:1.3.5'
    implementation 'org.jetbrains.kotlinx:kotlinx-coroutines-android:1.3.5'

    //Retrofit
    implementation 'com.squareup.retrofit2:retrofit:2.6.2'
    implementation 'com.squareup.retrofit2:converter-gson:2.6.0'
Coroutines, Retrofit 은 차후 firebase api를 이용하기 위해 사용된다!
3. 사용할 레이아웃 만들어두기
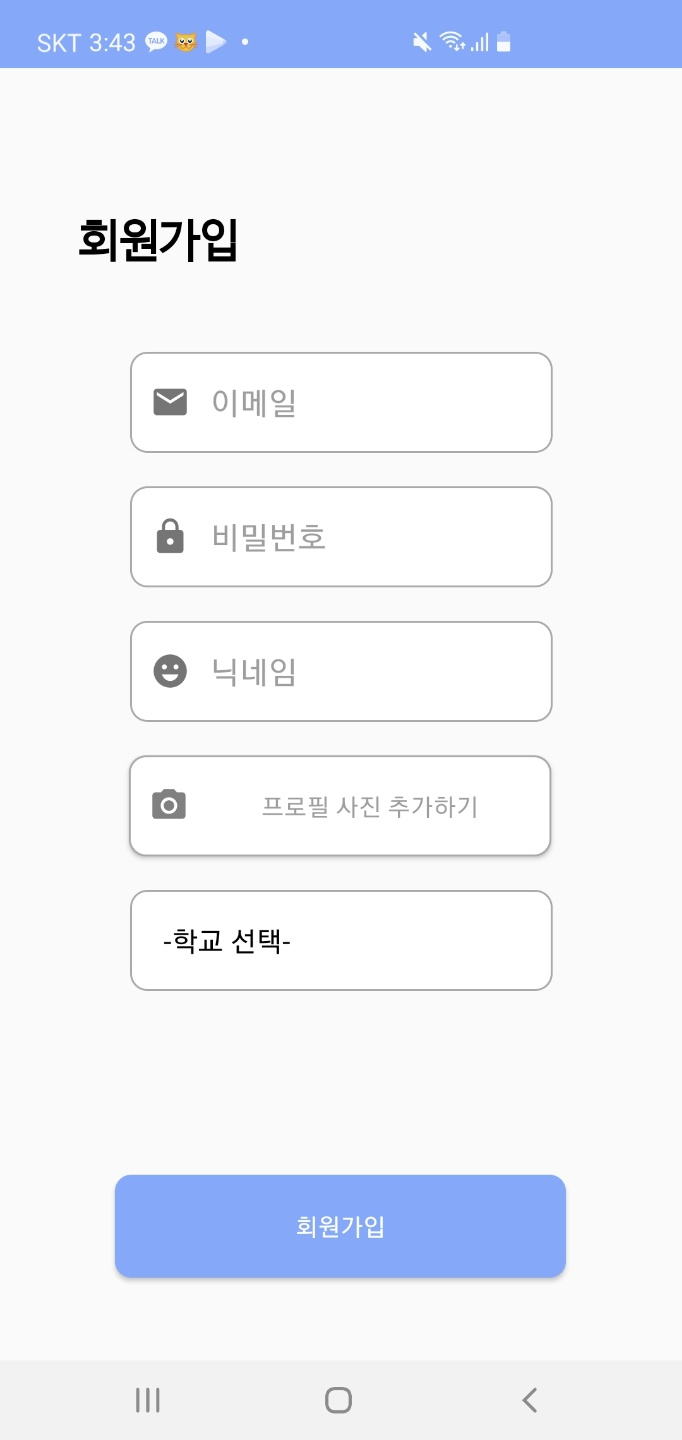
이렇게 Plain Text와 버튼이 있는 구조면 된다.
이거는 프로젝트라 빡빡하게 한 거고.. 굳이 커스터마이징까지 할 필요는 없다!
4. api 관련 키 값 등을 저장할 상수 데이터 클래스
class Constants {

    companion object {
        const val BASE_URL = "https://fcm.googleapis.com"
        const val SERVER_KEY = "???"
        const val CONTENT_TYPE = "application/json"
    }
}
요청을 보낼 BASE_URL과 fcm server key, 컨텐츠 타입을 넣는데 서버 키를 제외하고는 따라 쳐주시면 된다.
여러분의 서버 키는 다음과 같이 구할 수 있다.
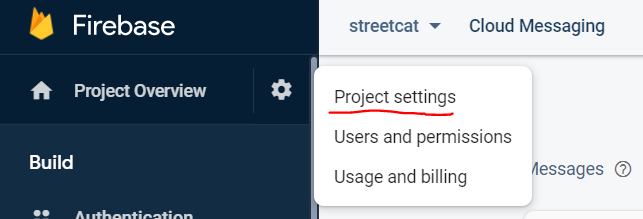
우측 상단 톱니바퀴 클릭 -> Project settings
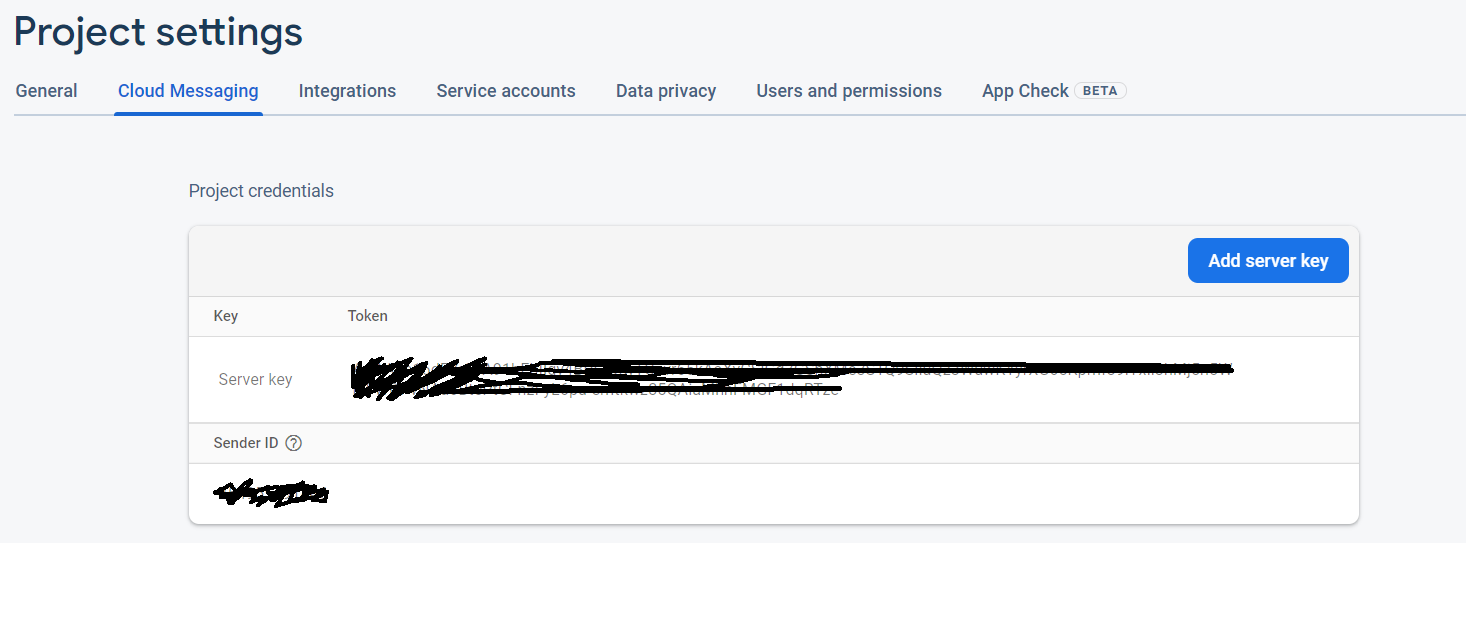
상단에 Cloud Messaging을 누르면 서버 키가 나온다. 그걸 위 코드에 붙여 넣어주면 된다.
5. api에 body로 전달할 데이터 클래스 만들기
data class NotificationData(
    val title: String,
    val message: String
)data class PushNotification(
val data: NotificationData,
val to: String
)
각각 이렇게 데이터 클래스를 만들어준다.
NotificationData의 title과 message는 우리가 통상적으로 알림이 오면, 어플 이름 - 내용이 뜨는 것처럼
어플 이름 부분이 제목, 내용이 메시지가 되겠다.
PushNotification은 데이터로 위 두 가지를 받고, to 변수는 알림을 보낼 디바이스 토큰, 또는 채널이 된다.
채널은 "구독" 형식인데, 해당 채널을 구독하고 있는 디바이스들에게 모두 알림이 가는 형태이다.
6. NotificationAPI 호출
import com.example.streetcat.data.Constants.Companion.CONTENT_TYPE
import com.example.streetcat.data.Constants.Companion.SERVER_KEY
import com.example.streetcat.data.PushNotification
import okhttp3.ResponseBody
import retrofit2.Response
import retrofit2.http.Body
import retrofit2.http.Headers
import retrofit2.http.POST

interface NotificationAPI {
    //서버 키와 보낼 형식을 헤더에 넣는다. (json)
    @Headers("Authorization: key=$SERVER_KEY", "Content-Type:$CONTENT_TYPE")
    @POST("fcm/send")
    suspend fun postNotification(
        @Body notification: PushNotification
    ): Response<ResponseBody>
}
이런 식으로 그대로 추가하면 된다. 따로 무언가 바꾸지 않아도 될 것이다.
7. Retrofit Instance 만들기
import com.example.streetcat.data.Constants.Companion.BASE_URL
import com.example.streetcat.activity.NotificationAPI
import retrofit2.Retrofit
import retrofit2.converter.gson.GsonConverterFactory

class RetrofitInstance {

    companion object {
        private val retrofit by lazy {
            Retrofit.Builder()
                .baseUrl(BASE_URL)
                .addConverterFactory(GsonConverterFactory.create())
                .build()
        }

        val api by lazy {
            retrofit.create(NotificationAPI::class.java)
        }
    }
}이건.. 일단 이렇구나! 하고 넘어가자
8. 토큰 가져오기
아까 만든 레이아웃에 버튼을 누르면 아래 코드를 실행시키도록 리스너를 만들어주자
val key = mAuth!!.currentUser.uid
FirebaseInstanceId.getInstance().instanceId.addOnSuccessListener {
    val database = FirebaseDatabase.getInstance()
    database.getReference("users").child(key).child("token").setValue(it.token)
}여긴 완전히 따라 하면 안 되고.. 코드 설명을 하자면
key는 현재 해당 유저의 uid
FirebaseInstanceId.getInstance().instanceId.addOnSuccessListener <-- 이 부분은 현재 토큰을 가져오는 가장 기본적이고 쉬운 코드이다. 내부에서 it.token을 콘솔에 띄우면 해당 디바이스의 토큰 값이 나온다.
(참고로 FirebaseInstanceId에서 deprecated 되었다고 작대기가 그어지던데.. 일단 지금은 작동하긴 한다!)
마지막은 그 토큰을 db에 저장하는 코드이다.
9. 알람 띄우는 함수
private fun sendNotification(notification: PushNotification) = CoroutineScope(Dispatchers.IO).launch {
    try {
        val response = RetrofitInstance.api.postNotification(notification)
        if(response.isSuccessful) {
            Log.d(TAG, "Response: ${Gson().toJson(response)}")
        } else {
            Log.e(TAG, response.errorBody().toString())
        }
    } catch(e: Exception) {
        Log.e(TAG, e.toString())
    }
}
이제 아까 다 만들었던 것들을 쓸 수 있다.
10. 가지고 있는 토큰으로 9번 함수 호출
val PushNotification = PushNotification(
    NotificationData("StreetCat", "내가 쓴 게시글에 댓글이 달렸어요!"),
    token
)
sendNotification(PushNotification)token은 db에서 가져온 string값 그대로이다.
sendNotification과 같은 파일에 있으면 그대로 작동할 것이다.
11. Fcm 관련 함수들
package com.example.streetcat.activity

import android.app.NotificationChannel
import android.app.NotificationManager
import android.app.NotificationManager.IMPORTANCE_HIGH
import android.app.PendingIntent
import android.app.PendingIntent.FLAG_ONE_SHOT
import android.content.Context
import android.content.Intent
import android.content.SharedPreferences
import android.graphics.Color
import android.os.Build
import androidx.annotation.RequiresApi
import androidx.core.app.NotificationCompat
import com.example.streetcat.R
import com.google.firebase.messaging.FirebaseMessagingService
import com.google.firebase.messaging.RemoteMessage
import kotlin.random.Random

private const val CHANNEL_ID = "my_channel"

class FirebaseService : FirebaseMessagingService() {

    companion object {
        var sharedPref: SharedPreferences? = null

        var token: String?
        get() {
            return sharedPref?.getString("token", "")
        }
        set(value) {
            sharedPref?.edit()?.putString("token", value)?.apply()
        }
    }

    // 사용자 디바이스 토큰 새로 생성
    override fun onNewToken(newToken: String) {
        super.onNewToken(newToken)
        token = newToken
    }

    //알람이 온 경우 --> 어떻게 보이게 할 것인지, 누르면 어디로 이동하게 할 것인지 정하는 메소드
    override fun onMessageReceived(message: RemoteMessage) {
        super.onMessageReceived(message)

        //알림 팝업 누를 시 MainActivity로 이동
        val intent = Intent(this, MainActivity::class.java)
        val notificationManager = getSystemService(Context.NOTIFICATION_SERVICE) as NotificationManager
        val notificationID = Random.nextInt()

        if(Build.VERSION.SDK_INT >= Build.VERSION_CODES.O) {
            createNotificationChannel(notificationManager)
        }

        intent.addFlags(Intent.FLAG_ACTIVITY_CLEAR_TOP)
        val pendingIntent = PendingIntent.getActivity(this, 0, intent, FLAG_ONE_SHOT)
        val notification = NotificationCompat.Builder(this, CHANNEL_ID)
            .setContentTitle(message.data["title"])
            .setContentText(message.data["message"])
            .setSmallIcon(R.drawable.ic_cat_smile)
            .setAutoCancel(true)
            .setContentIntent(pendingIntent)
            .build()

        notificationManager.notify(notificationID, notification)
    }

    @RequiresApi(Build.VERSION_CODES.O)
    private fun createNotificationChannel(notificationManager: NotificationManager) {
        val channelName = "channelName"
        val channel = NotificationChannel(CHANNEL_ID, channelName, IMPORTANCE_HIGH).apply {
            description = "My channel description"
            enableLights(true)
            lightColor = Color.GREEN
        }
        notificationManager.createNotificationChannel(channel)
    }
}
이 부분은 알람을 어떻게 띄울 것이고, 알람 팝업을 누르면 어떻게 이동할 것인지
그리고 토큰이 없는 경우 생성하는 법과 채널 만드는 법이 있다.
확실히 과정을 이해하지 못해서 그대로 두었는데, 이 부분도 꼭 필요하다.
나처럼 이해못하면 그냥 FcmService.kt 파일 하나 이렇게 만들면 작동할 것이다.
intent 부분과 icon 부분만 수정하면 그대로 써먹을 수 있을 듯하다..!
12. 결과물
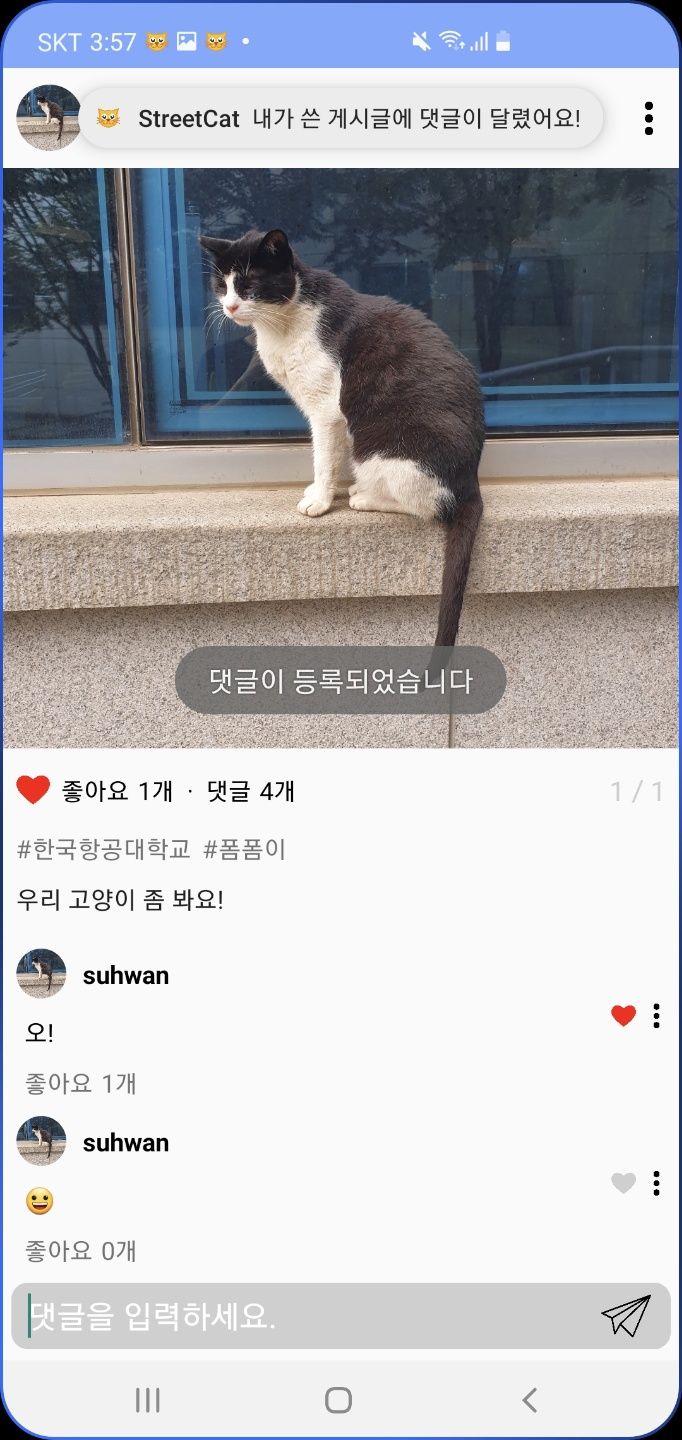
댓글은 결국 내가 썼지만.. 이렇게 댓글을 달면, 에타처럼 게시물 작성자에게 알림이 오는 서비스를 구현할 수 있다.
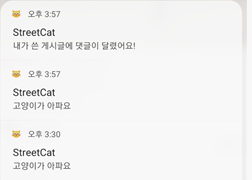
팝업은 이런 식으로 뜬다 하핫
안드로이드 안녕~

'Android' 카테고리의 다른 글
| MainActivity.kt 기본 설명 (0) | 2021.01.29 |
|---|---|
| 문자열 리소스화 & 다국어 지원 기능 (4) | 2021.01.27 |
| Android Studio 프로젝트 구성 (0) | 2021.01.27 |
| 코틀린 기본 문법 (0) | 2021.01.25 |
드디어 모바일 과목이 종강했다!
앞으로 안드로이드 스튜디오를 다시 켤 일이 없을 것 같긴 한데 (아니 삭제하기 전에)
마지막으로 프로젝트하면서 한글로 된 정보가 많이 없었던 Firebase fcm 서비스에 관련해 포스팅을 하고 마치도록 하겠다!
[시작 전 알고 있어야 할 내용들]
- Firebase와 프로젝트 연결 방법
- 기본적인 textview, button 넣는 방법 (xml 파일)
- Firebase database 사용 방법 (push, set, addValueEventListener, datachange snapshot,...)
뭐 많이 요구하는 것 같으나 fcm까지 왔으면 위 내용을 모를 수가 없다고 생각한다.
시작 전에, 이 포스팅 내용에 대해 영상을 보면서 따라 하고자 하면 아래 링크를 참고하면 좋을 것 같다.
1. fcm set up
[Tools] - [Firebase] 클릭 후 "Cloud Messaging"을 눌러 프로젝트에 fcm 기본 설정을 추가해준다.
2. Gradle : 모듈 파일에 fcm, coroutines, retrofit implement 후 sync 해주기!
    //fcm
    implementation 'com.google.firebase:firebase-messaging:20.0.0'

    //Coroutines
    implementation 'org.jetbrains.kotlinx:kotlinx-coroutines-core:1.3.5'
    implementation 'org.jetbrains.kotlinx:kotlinx-coroutines-android:1.3.5'

    //Retrofit
    implementation 'com.squareup.retrofit2:retrofit:2.6.2'
    implementation 'com.squareup.retrofit2:converter-gson:2.6.0'
Coroutines, Retrofit 은 차후 firebase api를 이용하기 위해 사용된다!
3. 사용할 레이아웃 만들어두기
이렇게 Plain Text와 버튼이 있는 구조면 된다.
이거는 프로젝트라 빡빡하게 한 거고.. 굳이 커스터마이징까지 할 필요는 없다!
4. api 관련 키 값 등을 저장할 상수 데이터 클래스
class Constants {

    companion object {
        const val BASE_URL = "https://fcm.googleapis.com"
        const val SERVER_KEY = "???"
        const val CONTENT_TYPE = "application/json"
    }
}
요청을 보낼 BASE_URL과 fcm server key, 컨텐츠 타입을 넣는데 서버 키를 제외하고는 따라 쳐주시면 된다.
여러분의 서버 키는 다음과 같이 구할 수 있다.
우측 상단 톱니바퀴 클릭 -> Project settings
상단에 Cloud Messaging을 누르면 서버 키가 나온다. 그걸 위 코드에 붙여 넣어주면 된다.
5. api에 body로 전달할 데이터 클래스 만들기
data class NotificationData(
    val title: String,
    val message: String
)
data class PushNotification(
val data: NotificationData,
val to: String
)
각각 이렇게 데이터 클래스를 만들어준다.
NotificationData의 title과 message는 우리가 통상적으로 알림이 오면, 어플 이름 - 내용이 뜨는 것처럼
어플 이름 부분이 제목, 내용이 메시지가 되겠다.
PushNotification은 데이터로 위 두 가지를 받고, to 변수는 알림을 보낼 디바이스 토큰, 또는 채널이 된다.
채널은 "구독" 형식인데, 해당 채널을 구독하고 있는 디바이스들에게 모두 알림이 가는 형태이다.
6. NotificationAPI 호출
import com.example.streetcat.data.Constants.Companion.CONTENT_TYPE
import com.example.streetcat.data.Constants.Companion.SERVER_KEY
import com.example.streetcat.data.PushNotification
import okhttp3.ResponseBody
import retrofit2.Response
import retrofit2.http.Body
import retrofit2.http.Headers
import retrofit2.http.POST

interface NotificationAPI {
    //서버 키와 보낼 형식을 헤더에 넣는다. (json)
    @Headers("Authorization: key=$SERVER_KEY", "Content-Type:$CONTENT_TYPE")
    @POST("fcm/send")
    suspend fun postNotification(
        @Body notification: PushNotification
    ): Response<ResponseBody>
}
이런 식으로 그대로 추가하면 된다. 따로 무언가 바꾸지 않아도 될 것이다.
7. Retrofit Instance 만들기
import com.example.streetcat.data.Constants.Companion.BASE_URL
import com.example.streetcat.activity.NotificationAPI
import retrofit2.Retrofit
import retrofit2.converter.gson.GsonConverterFactory

class RetrofitInstance {

    companion object {
        private val retrofit by lazy {
            Retrofit.Builder()
                .baseUrl(BASE_URL)
                .addConverterFactory(GsonConverterFactory.create())
                .build()
        }

        val api by lazy {
            retrofit.create(NotificationAPI::class.java)
        }
    }
}
이건.. 일단 이렇구나! 하고 넘어가자
8. 토큰 가져오기
아까 만든 레이아웃에 버튼을 누르면 아래 코드를 실행시키도록 리스너를 만들어주자
val key = mAuth!!.currentUser.uid
FirebaseInstanceId.getInstance().instanceId.addOnSuccessListener {
    val database = FirebaseDatabase.getInstance()
    database.getReference("users").child(key).child("token").setValue(it.token)
}
여긴 완전히 따라 하면 안 되고.. 코드 설명을 하자면
key는 현재 해당 유저의 uid
FirebaseInstanceId.getInstance().instanceId.addOnSuccessListener <-- 이 부분은 현재 토큰을 가져오는 가장 기본적이고 쉬운 코드이다. 내부에서 it.token을 콘솔에 띄우면 해당 디바이스의 토큰 값이 나온다.
(참고로 FirebaseInstanceId에서 deprecated 되었다고 작대기가 그어지던데.. 일단 지금은 작동하긴 한다!)
마지막은 그 토큰을 db에 저장하는 코드이다.
9. 알람 띄우는 함수
private fun sendNotification(notification: PushNotification) = CoroutineScope(Dispatchers.IO).launch {
    try {
        val response = RetrofitInstance.api.postNotification(notification)
        if(response.isSuccessful) {
            Log.d(TAG, "Response: ${Gson().toJson(response)}")
        } else {
            Log.e(TAG, response.errorBody().toString())
        }
    } catch(e: Exception) {
        Log.e(TAG, e.toString())
    }
}
이제 아까 다 만들었던 것들을 쓸 수 있다.
10. 가지고 있는 토큰으로 9번 함수 호출
val PushNotification = PushNotification(
    NotificationData("StreetCat", "내가 쓴 게시글에 댓글이 달렸어요!"),
    token
)
sendNotification(PushNotification)
token은 db에서 가져온 string값 그대로이다.
sendNotification과 같은 파일에 있으면 그대로 작동할 것이다.
11. Fcm 관련 함수들
package com.example.streetcat.activity

import android.app.NotificationChannel
import android.app.NotificationManager
import android.app.NotificationManager.IMPORTANCE_HIGH
import android.app.PendingIntent
import android.app.PendingIntent.FLAG_ONE_SHOT
import android.content.Context
import android.content.Intent
import android.content.SharedPreferences
import android.graphics.Color
import android.os.Build
import androidx.annotation.RequiresApi
import androidx.core.app.NotificationCompat
import com.example.streetcat.R
import com.google.firebase.messaging.FirebaseMessagingService
import com.google.firebase.messaging.RemoteMessage
import kotlin.random.Random

private const val CHANNEL_ID = "my_channel"

class FirebaseService : FirebaseMessagingService() {

    companion object {
        var sharedPref: SharedPreferences? = null

        var token: String?
        get() {
            return sharedPref?.getString("token", "")
        }
        set(value) {
            sharedPref?.edit()?.putString("token", value)?.apply()
        }
    }

    // 사용자 디바이스 토큰 새로 생성
    override fun onNewToken(newToken: String) {
        super.onNewToken(newToken)
        token = newToken
    }

    //알람이 온 경우 --> 어떻게 보이게 할 것인지, 누르면 어디로 이동하게 할 것인지 정하는 메소드
    override fun onMessageReceived(message: RemoteMessage) {
        super.onMessageReceived(message)

        //알림 팝업 누를 시 MainActivity로 이동
        val intent = Intent(this, MainActivity::class.java)
        val notificationManager = getSystemService(Context.NOTIFICATION_SERVICE) as NotificationManager
        val notificationID = Random.nextInt()

        if(Build.VERSION.SDK_INT >= Build.VERSION_CODES.O) {
            createNotificationChannel(notificationManager)
        }

        intent.addFlags(Intent.FLAG_ACTIVITY_CLEAR_TOP)
        val pendingIntent = PendingIntent.getActivity(this, 0, intent, FLAG_ONE_SHOT)
        val notification = NotificationCompat.Builder(this, CHANNEL_ID)
            .setContentTitle(message.data["title"])
            .setContentText(message.data["message"])
            .setSmallIcon(R.drawable.ic_cat_smile)
            .setAutoCancel(true)
            .setContentIntent(pendingIntent)
            .build()

        notificationManager.notify(notificationID, notification)
    }

    @RequiresApi(Build.VERSION_CODES.O)
    private fun createNotificationChannel(notificationManager: NotificationManager) {
        val channelName = "channelName"
        val channel = NotificationChannel(CHANNEL_ID, channelName, IMPORTANCE_HIGH).apply {
            description = "My channel description"
            enableLights(true)
            lightColor = Color.GREEN
        }
        notificationManager.createNotificationChannel(channel)
    }
}
이 부분은 알람을 어떻게 띄울 것이고, 알람 팝업을 누르면 어떻게 이동할 것인지
그리고 토큰이 없는 경우 생성하는 법과 채널 만드는 법이 있다.
확실히 과정을 이해하지 못해서 그대로 두었는데, 이 부분도 꼭 필요하다.
나처럼 이해못하면 그냥 FcmService.kt 파일 하나 이렇게 만들면 작동할 것이다.
intent 부분과 icon 부분만 수정하면 그대로 써먹을 수 있을 듯하다..!
12. 결과물
댓글은 결국 내가 썼지만.. 이렇게 댓글을 달면, 에타처럼 게시물 작성자에게 알림이 오는 서비스를 구현할 수 있다.
팝업은 이런 식으로 뜬다 하핫
안드로이드 안녕~
'Android' 카테고리의 다른 글
| MainActivity.kt 기본 설명 (0) | 2021.01.29 |
|---|---|
| 문자열 리소스화 & 다국어 지원 기능 (4) | 2021.01.27 |
| Android Studio 프로젝트 구성 (0) | 2021.01.27 |
| 코틀린 기본 문법 (0) | 2021.01.25 |